Affiliate links may be included for your convenience. View our privacy and affiliates policy for details.
After crocheting my daughter’s axolotl, I had a bunch of my second color of Bernat Blanket yarn left, so I decided to make this giant Peep bunny knitting pattern.
I knew I wanted to try to do something with the yarn right away, because it’s the only yarn I’ve bought this year and I wanted to make sure it didn’t end up in my stash.
I was looking at my old Easter knitting patterns and found the little bunny Peep I made a few years ago. Since big amigurumi worked in blanket yarn is popular right now I thought it would be fun to knit a giant bunny Peep. And it was!
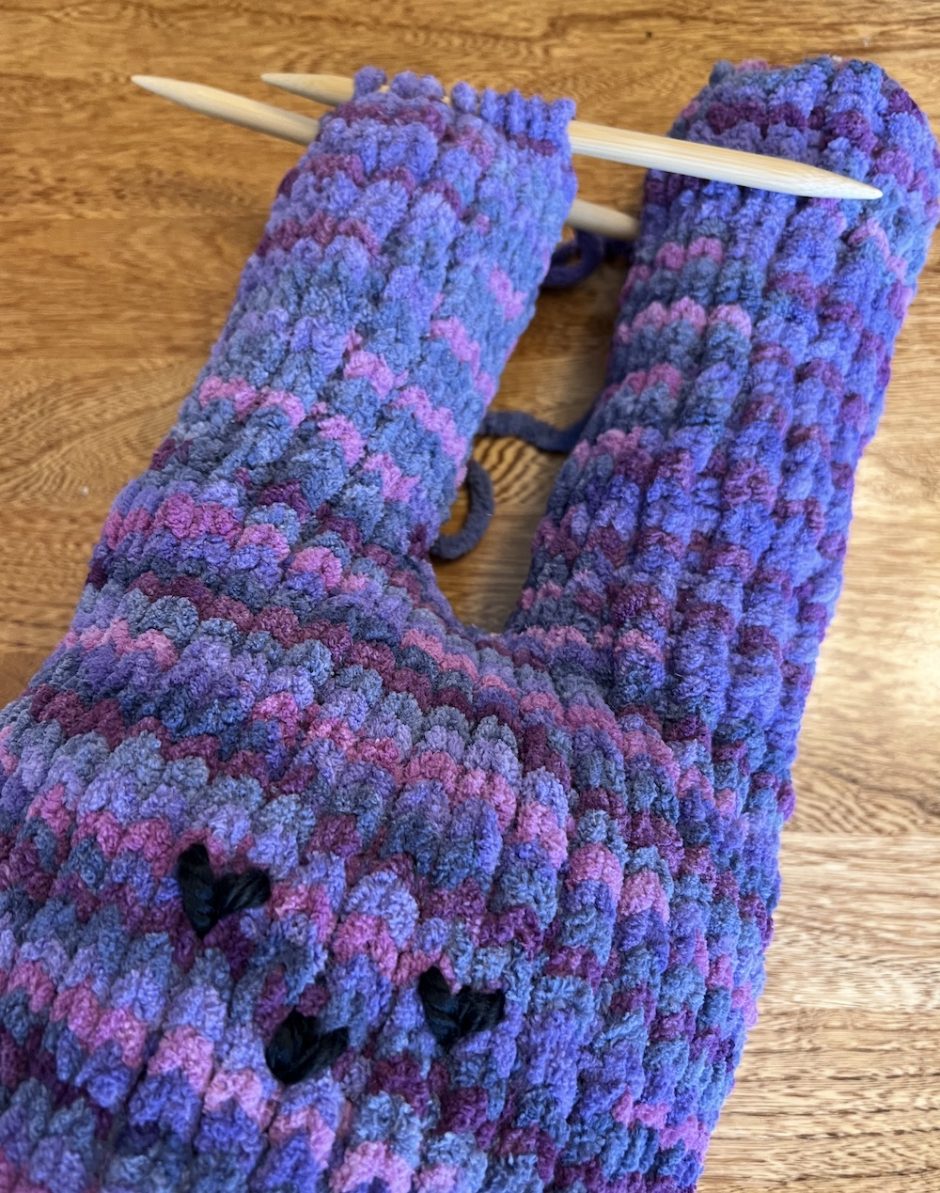
How to Knit a Giant Bunny Peep
This Peep bunny knitting pattern is worked from the bottom up, so you start with just a few stitches and increase regularly to the size of the base of the bunny. I worked a round of purl stitches to serve as the edge of the base, then knit straight for the length of the body.
A few decreases the shape of the neck, then you increase back a little to knit the head. The ears are worked one at a time from the head stitches, so there are no seams except a tiny one in between the ears.
It’s a really quick and easy knitting pattern as long as you’re comfortable working in the round and can accommodate the awkwardness of knitting the second ear when the whole body has been stuffed and is standing upright.
Justification Rabbit
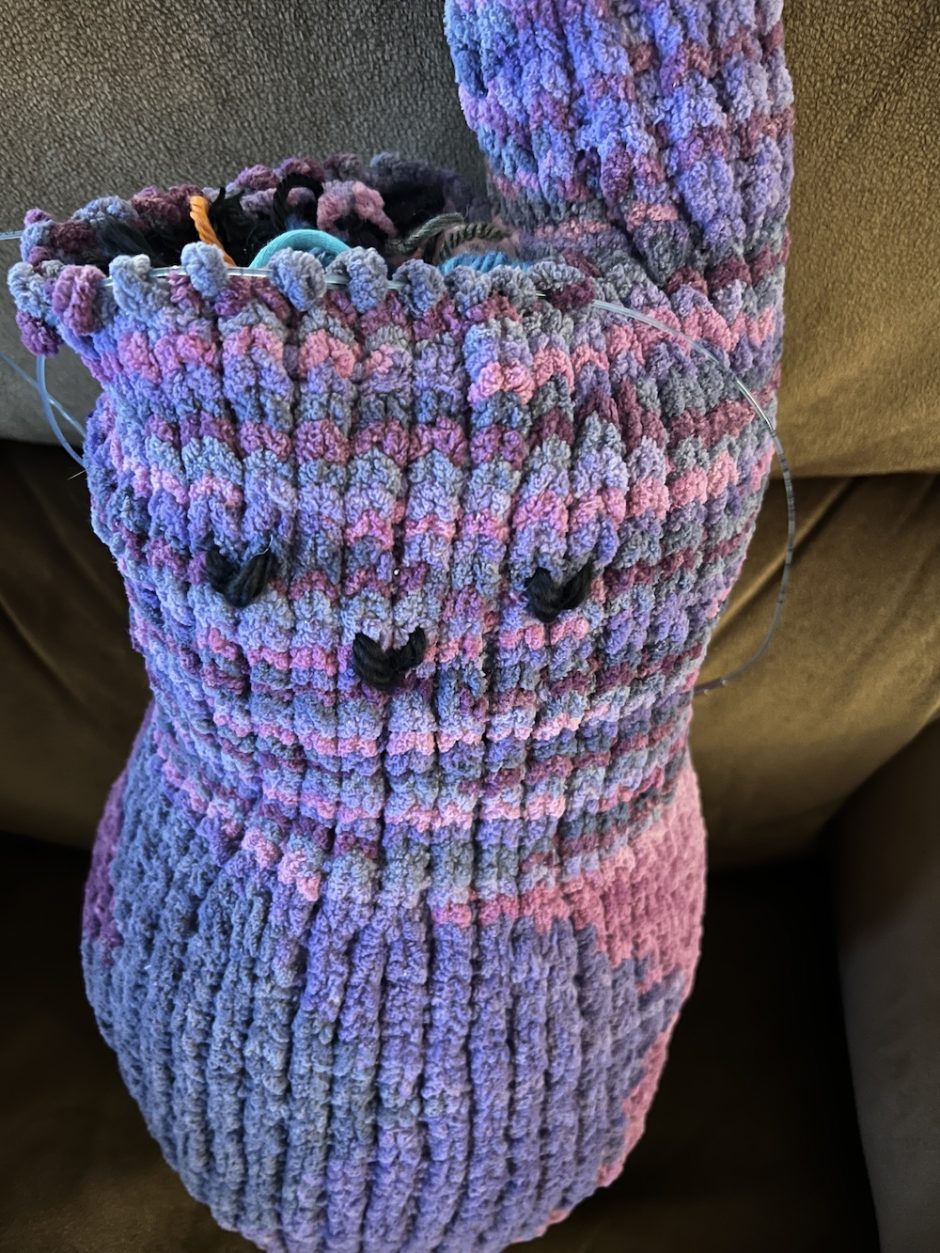
I joked on Instagram that this project should be called Justification Rabbit, because it serves as justification for you (or me, anyway) having saved all those random little bits of whatever through the years.
This bunny is stuffed with (probably not an exhaustive list):
- yarn ends and thread ends from a multitude of projects
- the tops of T-shirts I turned into T-shirt yarn
- the edges of cloth napkins that were getting worn so I cut the hems off
- old swatches
- bits of finger knitting from when my kind was into finger knitting
- yarn pom poms
- tiny fabric scraps
- actual stuffing
It weighs 3.5 pounds and can stand on its own because it is stuffed so well with so much heavy stuff. The only place I used regular stuffing was in the ears.
Supplies for the Giant Peep Bunny
- one skein Bernat Blanket yarn (mine is in the Purple Sunset colorway) or around 200 yards of weight 6, super bulky yarn (or try two strands of worsted weight held together)
- set of size 11 US/8mm double pointed knitting needles and a circular needle of the same size, whatever length you have handy
- locking stitch markers
- yarn needles
- a tiny bit of black yarn
- all the stuffing you have in your house
Gauge is not critical for this project, but you want to make sure your stitches are firm enough that the random stuff you stuff it with (or the stuffing, if you’re playing it normal) won’t show through or fall out. I got 9 stitches and 12 rounds per 4 inches/10cm in Stockinette Stitch in the round.
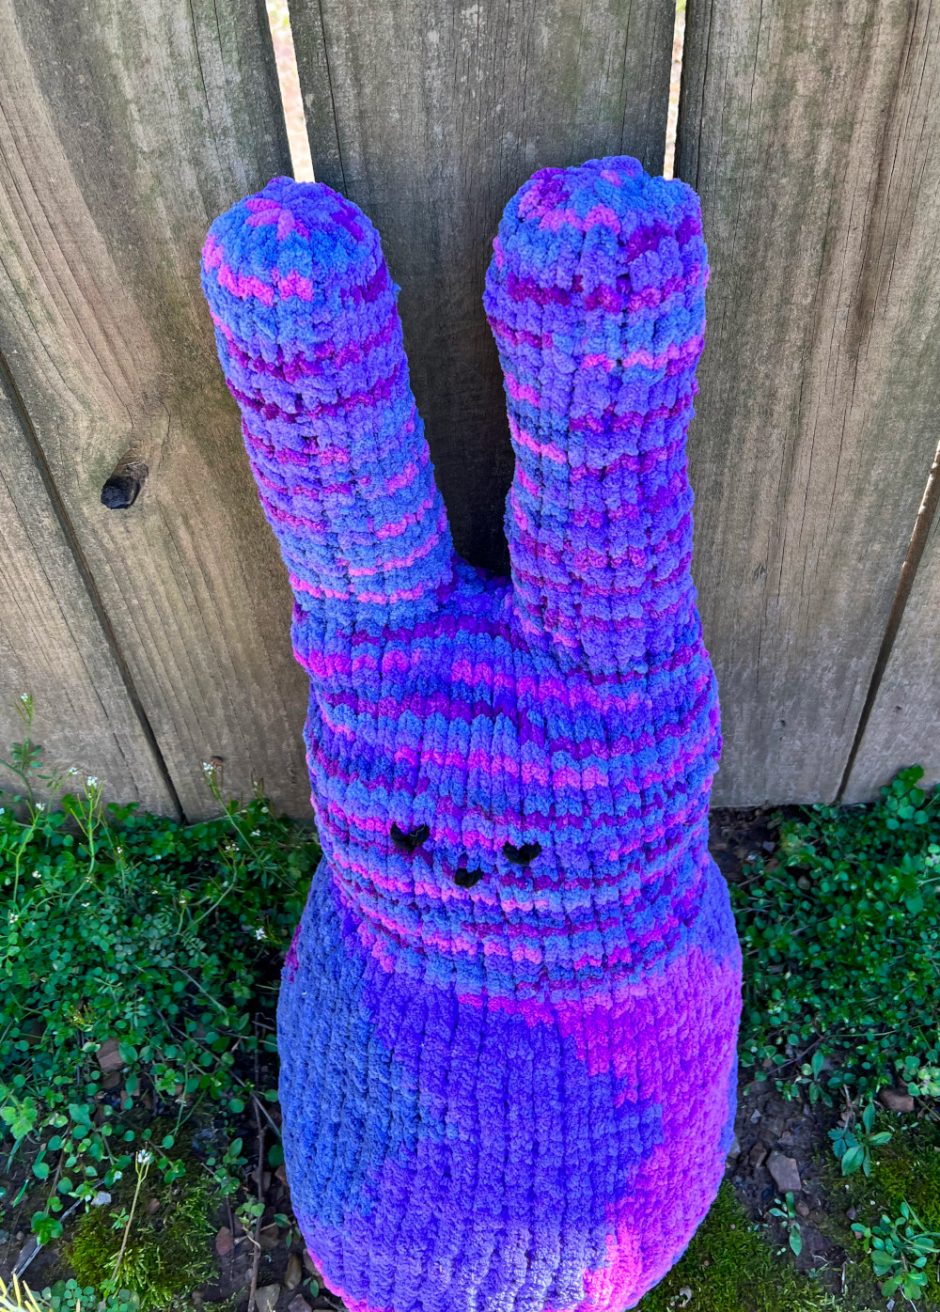
The size of your peep style bunny may vary depending on your gauge and personal preferences, but mine is 8 inches/20cm at the base, 25 inches/63.5cm tall from the base to the top of the ears, and 29.5 inches/75cm around the belly.
Giant Peep Bunny Knitting Pattern
Starting with your double pointed needles, cast on 6 stitches and divide onto 3 double pointed needles. Join for working in the round, placing a stitch marker in the first stitch to mark the beginning of the round (move this up as you go, and change to your circular needle when needed to accommodate stitches).
Knit 1 round.
Knit in the front and back of each stitch. 12 stitches.
Knit 2 rounds.
Knit in the front and back of each stitch. 24 stitches.
Knit 3 rounds.
Knit in the front and back of each stitch. 48 stitches.
Knit 4 rounds, then purl 1 round.
Knit every round for 10 inches/25.5cm from the purl round, or to the desired body height.
*Knit 2, knit 2 together. Repeat from * around. 36 stitches.
Knit 3 rounds.
Knit in the front and back of the first stitch, stitch 17 and 18, and the last stitch. 40 stitches.
Knit each round for 6 inches/15cm from the increase in round, or to desired size for the head.
Work a knit 2 together with the first 2 stitches, stitches 18 and 19, 20 and 21, and the last 2 stitches. 36 stitches.
Knitting the Ears
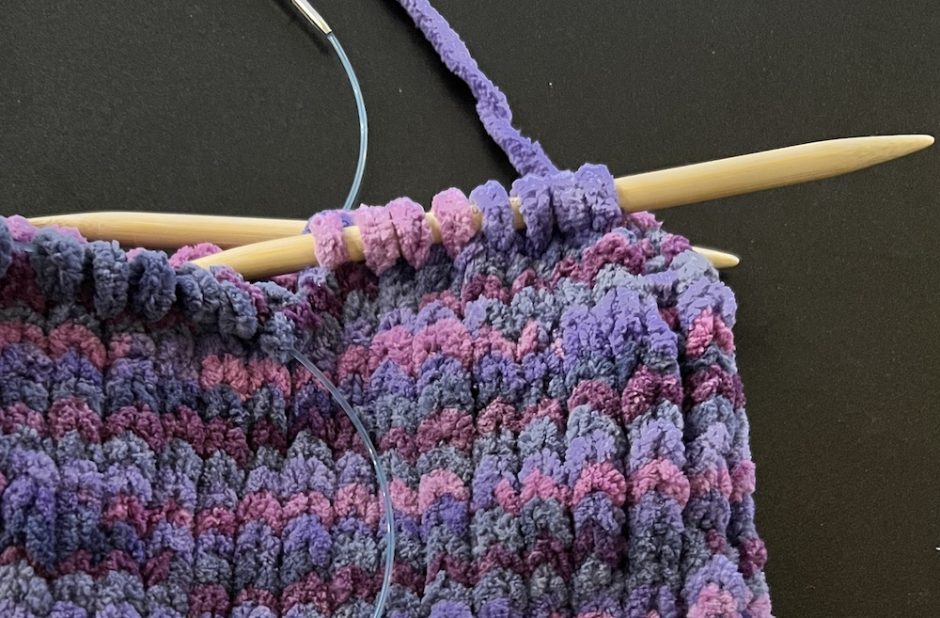
Slide the first 8 and last 8 stitches of the round onto double pointed needles (you can work on two needles and knit with a third, or arrange the stitches on three needles if you’d rather). Place stitch marker at the beginning of round if needed.
Knit just these 16 stitches until piece measures 8 inches/20cm or desired length for the ear.
Knit 2 together in the first 2 stitches, stitches 7 and 8 and 9 and 10, and the last 2 stitches. 12 stitches. Stuff the ear with the stuffing of your choice.
Cut yarn, leaving a long tail. Thread tail onto a yarn needle and slide remaining stitches onto the needle. Pull tight, weave through the stitches again and put the tail through the center of the ear.
Stuff the body and head of the bunny before completing the second ear. Add facial features with black yarn as desired.
Place the remaining 20 stitches on two double-pointed needles. Join in the yarn, and work a three-needle bind off on the first two sets of stitches, then bind off the remaining stitch with the first stitch of the round (see below for more on how to do this). 16 stitches remain.
Use the yarn tail to sew up the holes between the ears, and work the second ear as the first. Make sure you add stuffing as you go, since it will be hard to get to the bottom of the ear through the tube.
Helpful Tips
The bind off between the ears sounds a little confusing, but we are just eliminating two stitches on the front and back to make space between the ears. Doing a three needle bind off is like knitting the stitch from the front needle together with the stitch from the back needle.
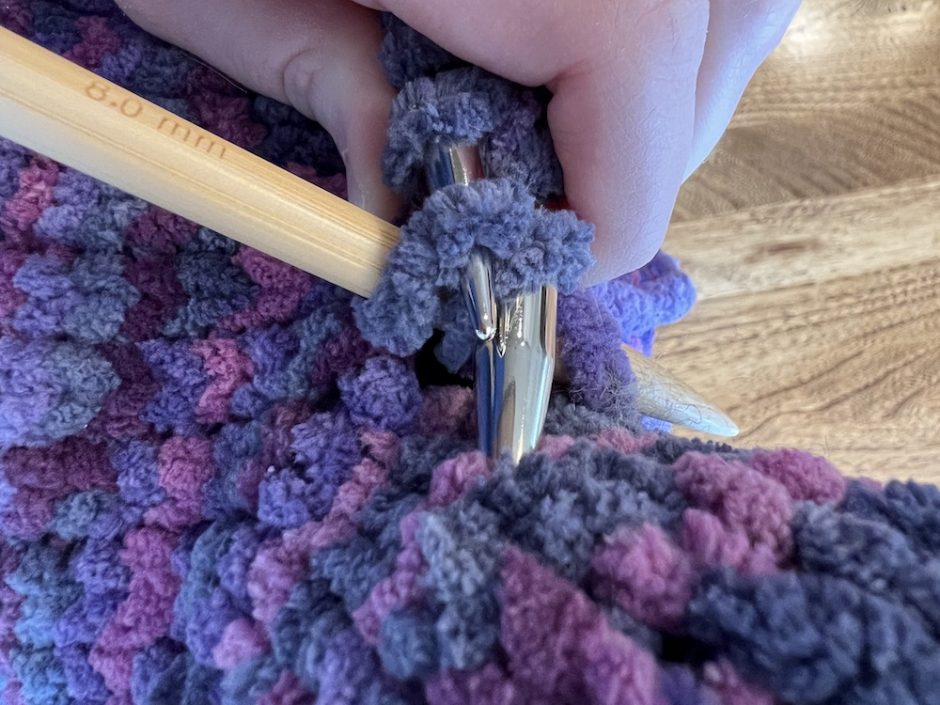
Do that twice, then pull the first stitch over the second stitch. You’ve now reduced 4 stitches to 1. To get rid of that last stitch, knit the first stitch of the ear and pull the stitch over the stitch you just knit as if to bind off.
If you’d rather you can graft these stitches or you could even try closing them off like the tops of the ears.
For the face I used bulky black yarn and just did duplicate stitch for a nose and two eyes. As in real bunny Peeps, the eyes are close together and close to the nose, but you can style yours however you like.
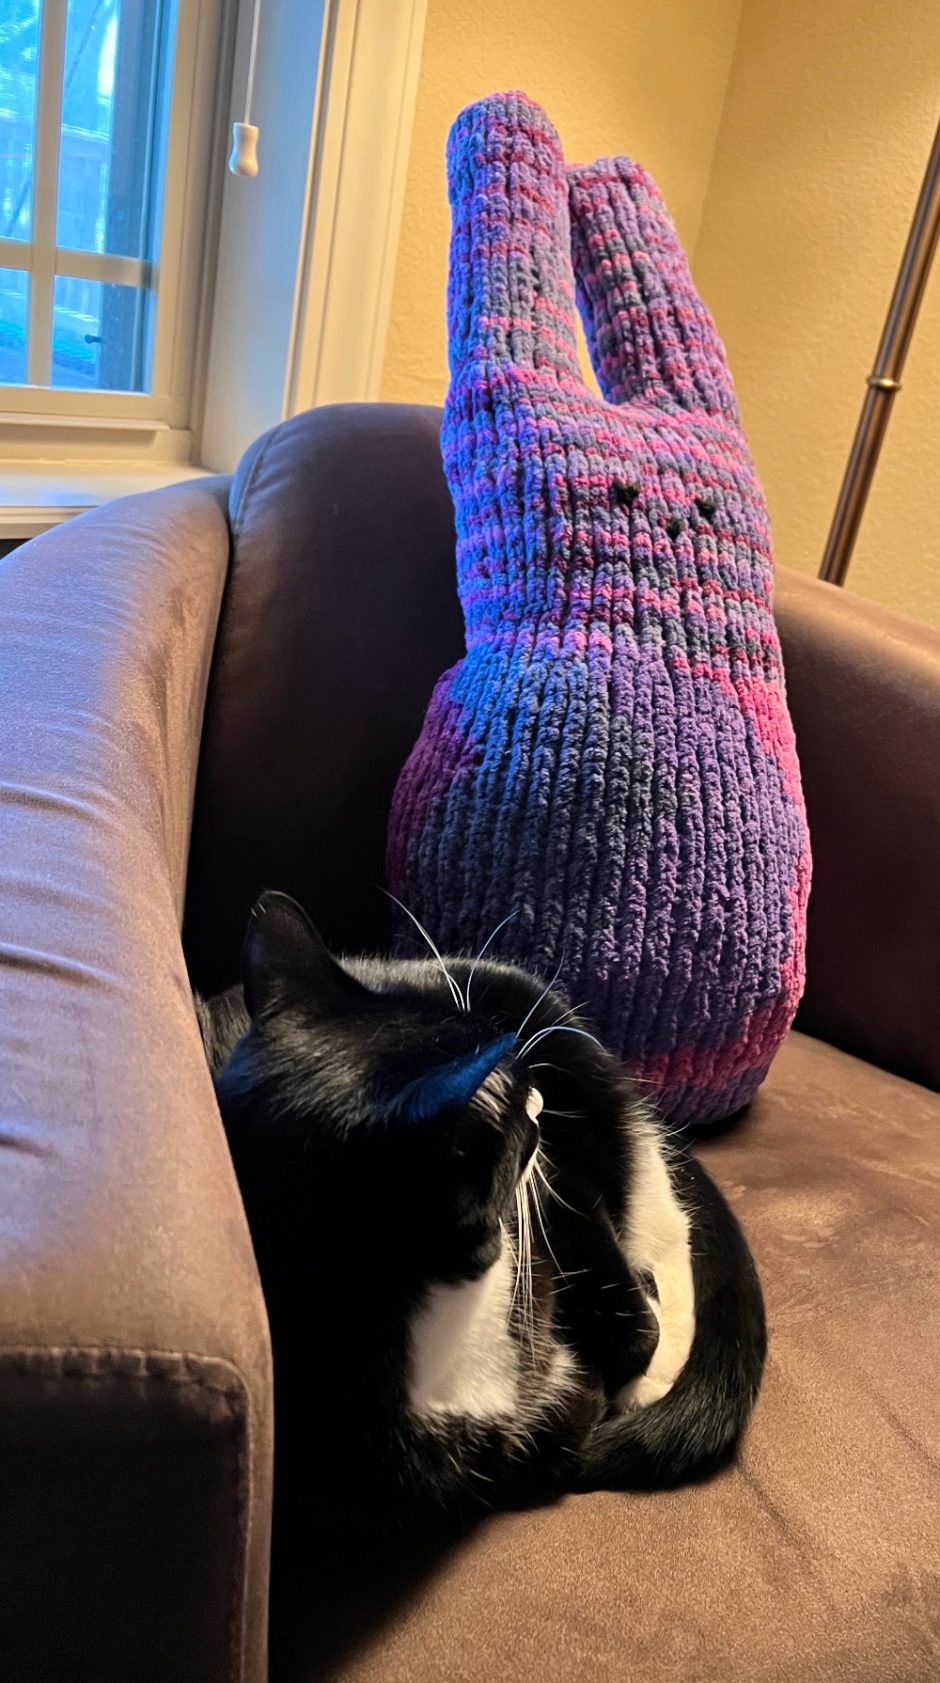
And that’s the giant Peep bunny knitting pattern! I hope you give this one a try because it’s so fun to have a giant Peep style bunny hanging around the house. The satisfaction that comes from using all that random stuffing material is pretty great too.
What’s the weirdest thing you’ve ever used to stuff a project? I’d love to hear about it!
When knitting the last ear, the project will be totally stuffed other than the ear you are knitting. This makes it tall and potentially heavy. I knit the second ear standing up, with the bunny standing on a table (or a chair or the last few rounds) to make it easier to deal with. It’s only 30 or so rounds, so it won’t take long.
(Visited 154 times, 1 visits today)
